What you need
- A 3D printer and PLA filament. Basic and matte PLA both work. PETG needs more heat and resists forming.
- Two printed molds: a die with a cavity and a stamp that fits into it. PETG molds last longer; PLA molds are fine for a few pieces.
- A heat gun, or a bowl of water at 80–90 °C. A hair dryer works on thin meshes but is slow.
- Heat-resistant gloves, a bowl of cold water and a flat, stable table.
Safety. PLA softens around 60 °C, so a heat gun or hot water can burn you quickly. Wear gloves, keep the heat gun moving and work in a ventilated room.
-
Print the mesh flat
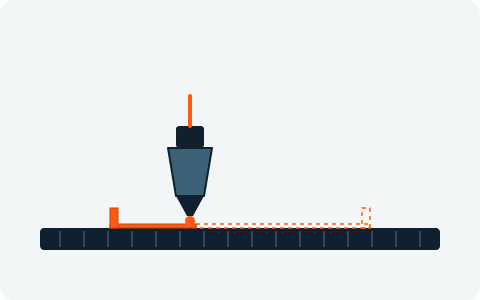
Lay the mesh half flat with the rim facing up. Use 0.2 mm layers, a 0.4 mm nozzle and no supports. The plate is 0.8 mm thick (four layers): stiff enough to keep its shape, thin enough to stretch. Print a second half for the back.
-
Seat it in the die
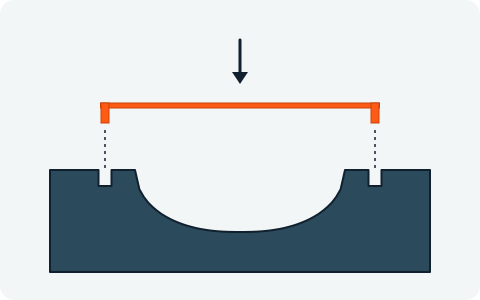
Turn the mesh over so the rim points down and drop the rim into the groove around the cavity. The flat plate rests on the die and bridges the cavity. If the rim does not drop in easily, look for stringing instead of forcing it.
-
Heat it evenly
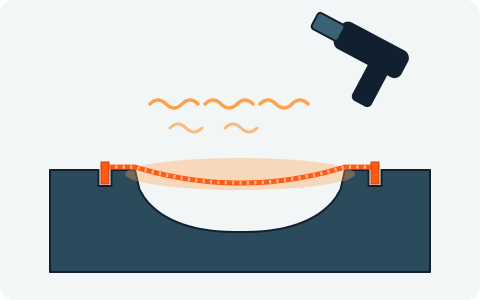
Hold the heat gun about 10 cm away and move it in slow circles for 20–40 seconds. The mesh turns glossy and starts to sag into the cavity under its own weight. That is the moment to stop. No heat gun? Dip the printed mesh in 80–90 °C water for 15–20 seconds, then lay it on the die quickly.
-
Press with the stamp
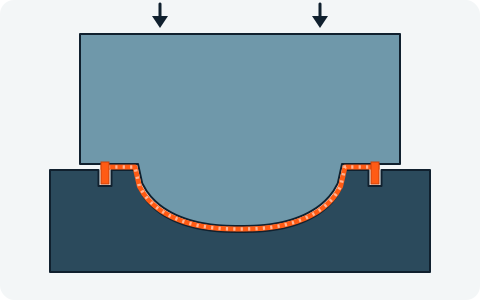
Push the stamp straight down until it bottoms out. Press evenly and do not twist. The gap between stamp and die is slightly larger than the mesh, so the strands stretch into shape without being crushed. Hold it for about 30 seconds.
-
Cool and release
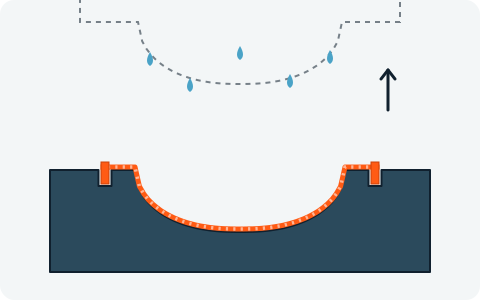
Pour cold water over the mold, or wait a minute, so the plastic sets. Lift the stamp, then lift the mesh out by its rim. It keeps the dome. Repeat with the second half; a symmetric shape uses the same mold for both.
-
Fill and assemble

Put the candy in and join the two halves flat side to flat side. Slide the clips onto the lowered parts of the rim and screw the nut onto the threaded neck. The ring on the nut is for hanging.
Starting points
| Setting | Start with |
|---|---|
| Mesh thickness | 0.8 mm (4 layers of 0.2) |
| Cell size / strand width | 4 mm / 0.8 mm |
| Dome depth | 70–80 % of a hemisphere |
| Heat gun distance | about 10 cm |
| Heating time | 20–40 s |
| Hold under the stamp | about 30 s |
| Hot-water alternative | 80–90 °C for 15–20 s |
| Rim in the groove | 0.15 mm clearance per side |
Fixing common problems
The shape comes out shallow or flat
The mesh was not soft enough. Heat it a few seconds longer and press again while it is still glossy. Meshes with big cells and thin strands stretch more easily; a denser or thicker mesh needs more heat.
The mesh tears
Usually one spot overheated or the strands are too thin. Keep the heat gun moving, keep strands 0.5 mm or wider and reduce the dome depth if you press very deep.
There are wrinkles near the rim
The rim was not fully seated or one side heated faster. Check that the rim sits in the groove all the way around before you heat.
The mesh sticks to the stamp
It is still too hot. Wait for it to cool, or wet the stamp with cold water before pressing.
The halves do not fit together
Uneven cooling bends the flat flange. Hold the stamp down for the full 30 seconds and let both halves cool flat before assembling.
The mold deforms
Heat the mesh, not the mold. Keep the heat gun on the mesh, and print molds in PETG if you reuse them often.
Want to skip the modelling?
The generator will build the mesh halves, molds, clips and nut for any shape or image, with these tolerances built in.
Back to the generator